How to Set Up a Proxy in Vision Browser
Configure an external proxy while creating a Vision browser profile, or add it through the Proxy section of the appropriate folder. Keep the folder, proxy entry and profile assignment together when checking the setup.
Documentation reviewed 31 October 2026 · Proxyca setup guide
Get your Proxyca connection details
Residential proxies
Buy a GB package. Open My proxies → Generate, choose quantity, country, city, protocol and rotation or sticky settings, then generate your connections.
Datacenter proxies
Open Static proxies, choose country, IP quantity and rental period, then pay. Open the issued order in My proxies.
Copy the host, port, username and password for one connection. The hostname:port:username:password format puts those four fields in that order. In a browser with separate fields, paste each value into its matching field and select the issued protocol.
Have the issued endpoint ready
Open the connection details supplied with your proxy order. Keep the host, port, protocol and any username and password together. Use the values for the same endpoint; do not combine a port from an example with credentials from an order.
A hostname is entered as issued. A port is a connection setting, not an IP address. When authentication is required, the proxy username and password are separate from your Vision account login. Keep them out of screenshots you send to a public forum.
Add the endpoint in the profile creation sidebar
- Open the folder where you want to work. On Profiles, choose Create Profile and use Add Proxy in the creation sidebar.
- Fill in the proxy protocol, host or IP, port and any login and password supplied with the endpoint. Use the issued values rather than the sample values in a screenshot.
- Proxy Name and IP Change Link are optional in the documented proxy form. Supply a change link only if the product actually provides one.
- Review the proxy details, then create the profile. An alternative route is the folder’s Proxy tab → Create Proxy, followed by saving the completed proxy form.
Menu labels can vary by version. These instructions follow the Vision proxy creation instructions.
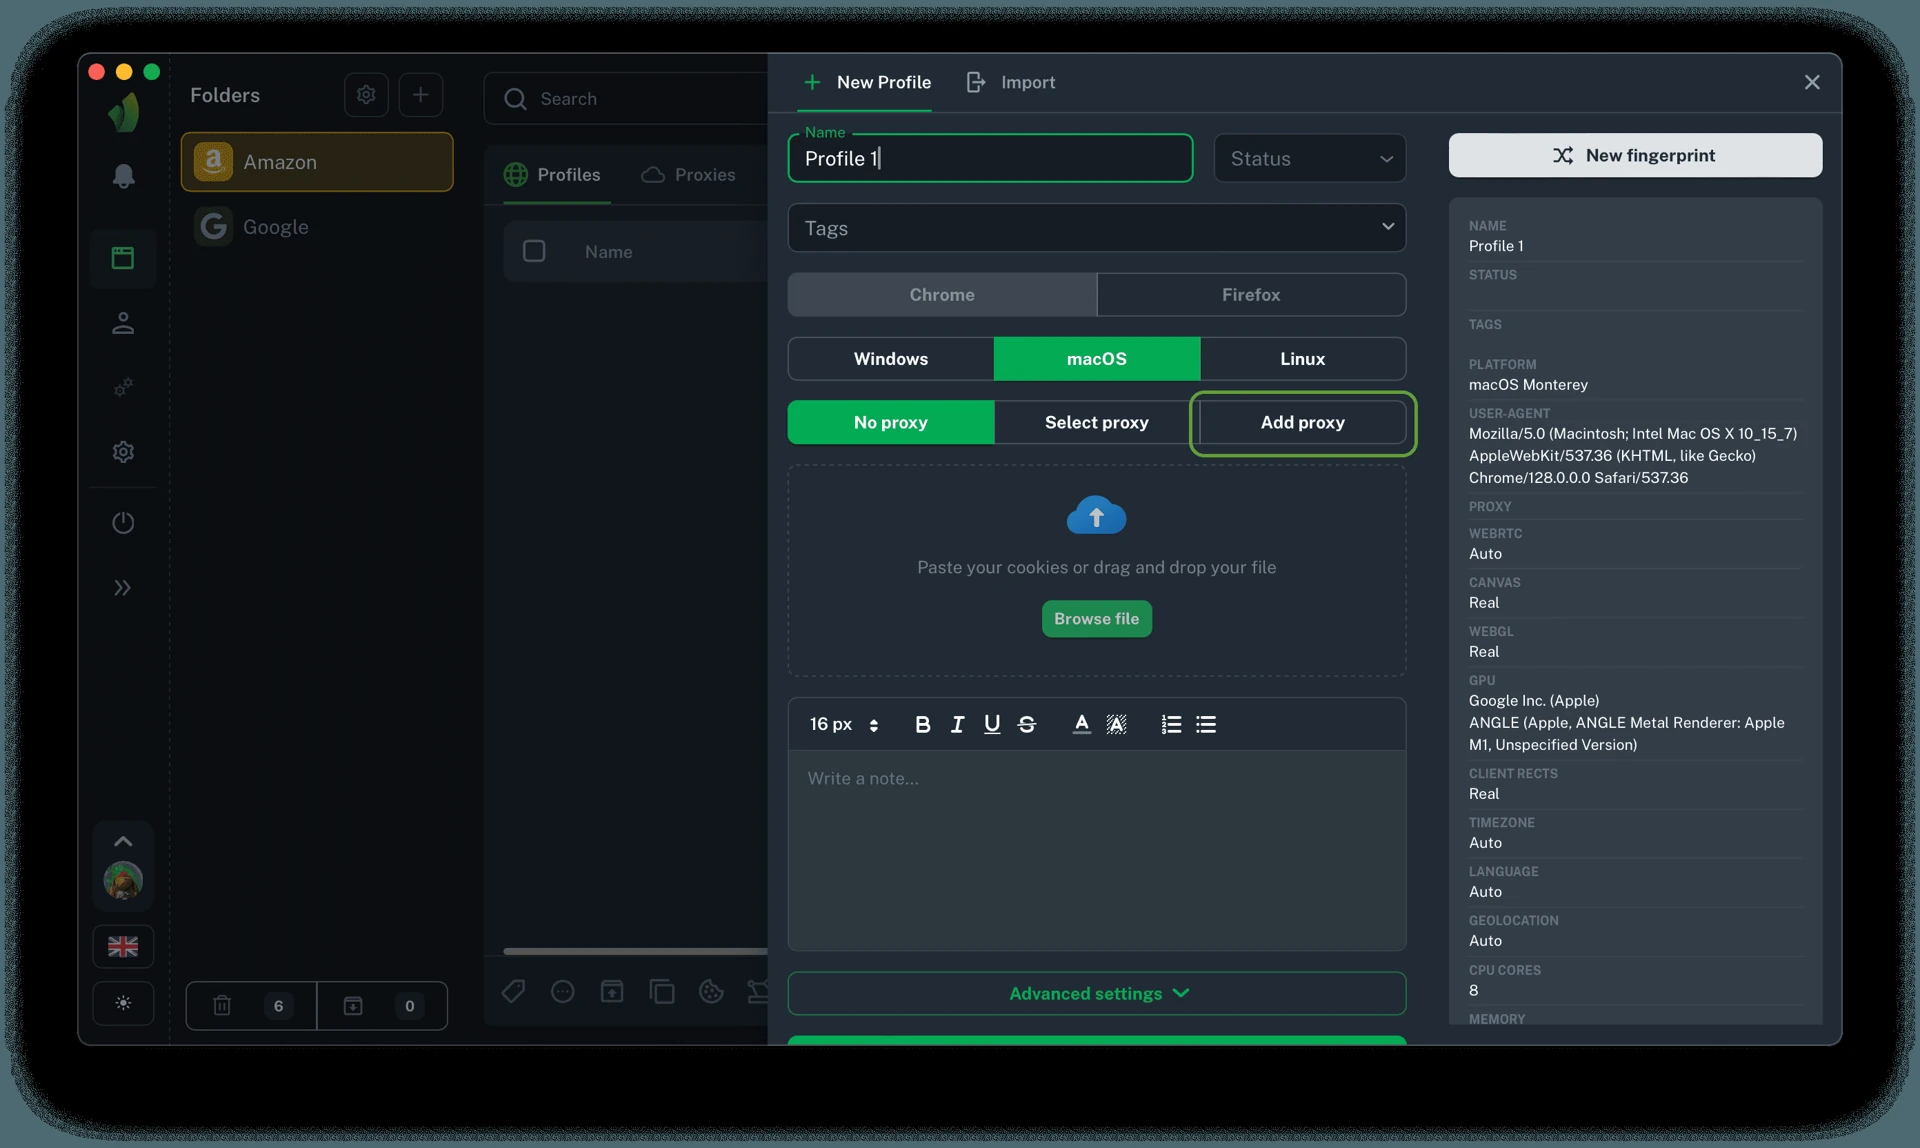
Check the folder before looking for a saved proxy
Vision’s documentation places proxy entries at folder level. An entry added in one folder does not automatically appear in another. If a proxy seems missing, verify the folder before importing the same endpoint again.
For a repeatable test, write down the folder, the browser profile name and the endpoint host and port. These are different identifiers. A folder can contain several entries, and similar profile names can make it easy to open a different configuration from the one you just edited.
What the proxy controls look like
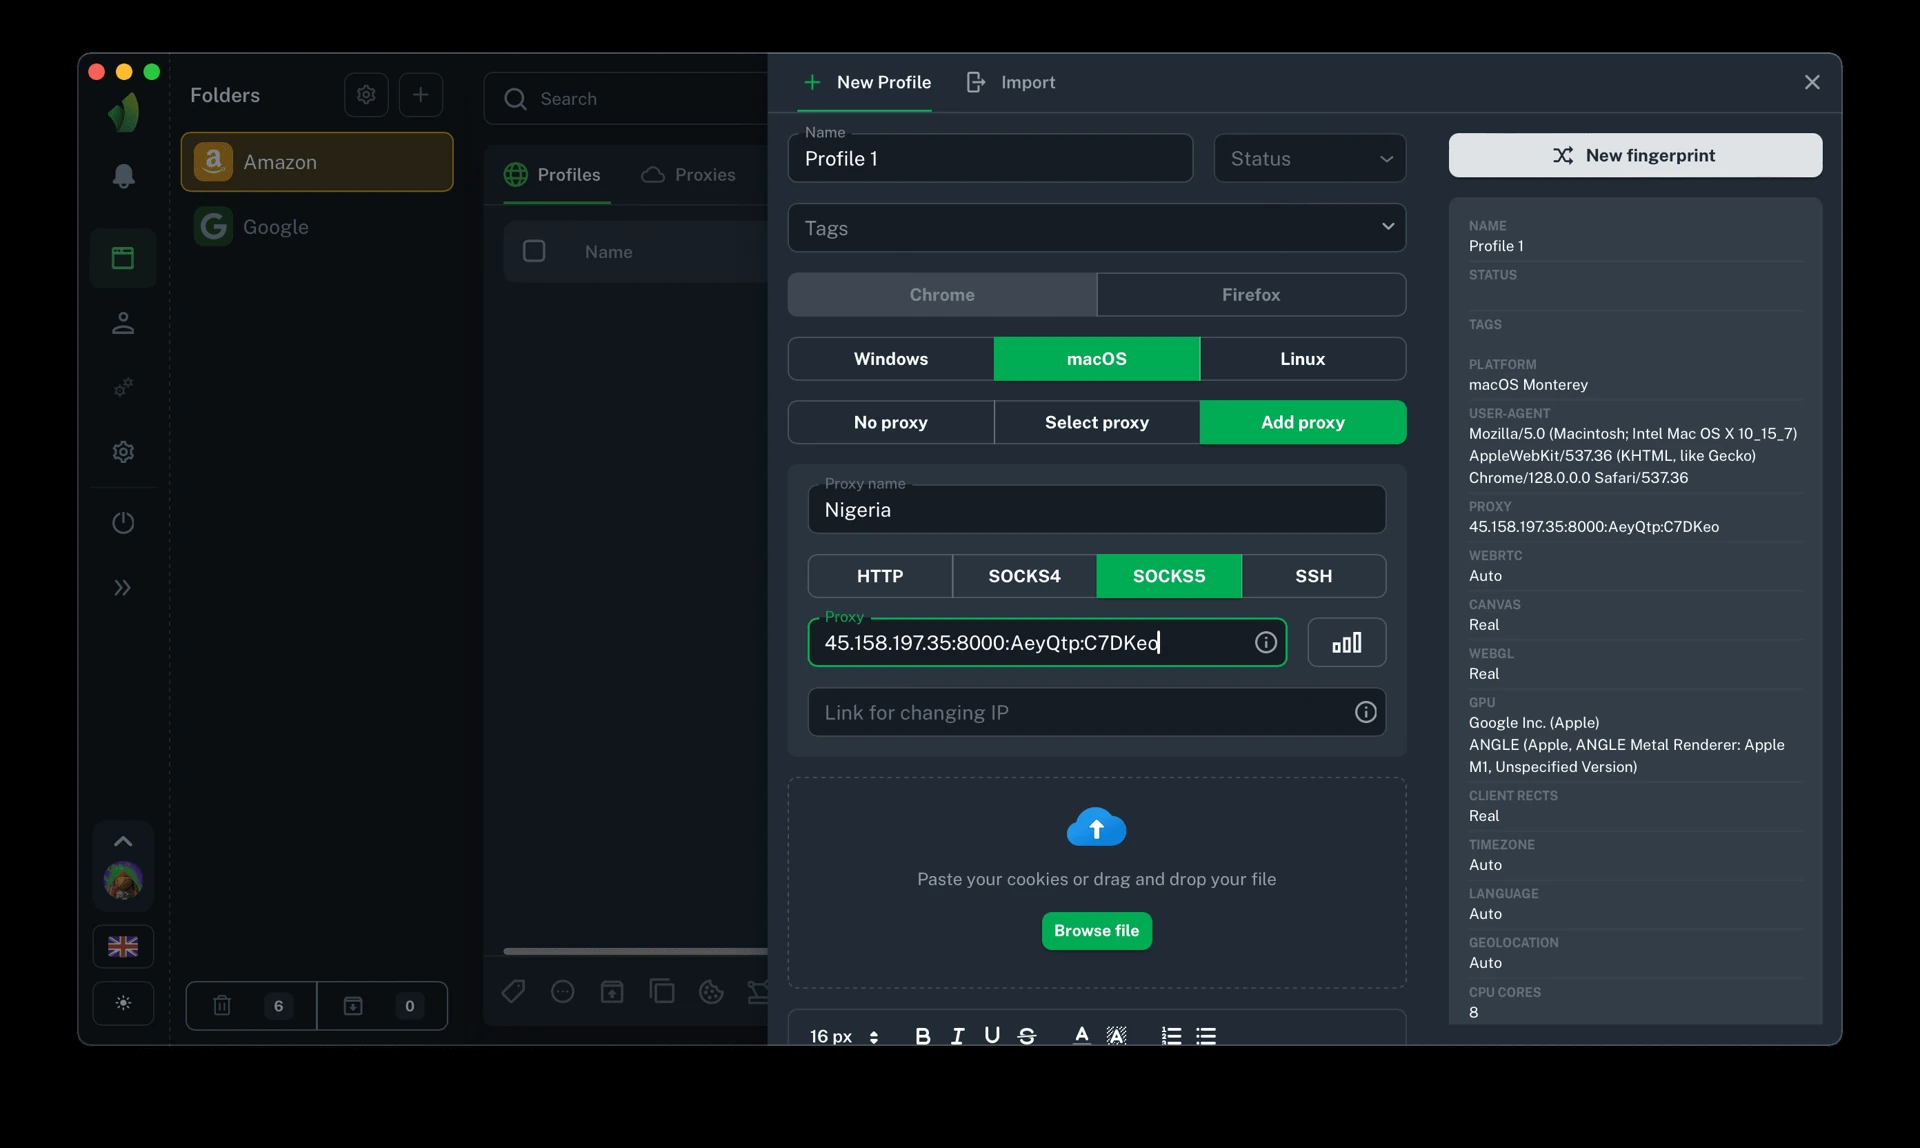
The images show the developer’s documented interface. Example credentials or profile names in them are not a Proxyca endpoint; enter the details issued with your own order.
Confirm the profile assignment after saving
Launch the profile you created and open an IP lookup from that profile window. Record its observed address and the test time. A lookup in a normal browser tests that browser’s route rather than proving which proxy Vision used.
If the result is unexpected, return to the profile settings and compare the endpoint with your order. Start with the selected folder and saved entry before changing unrelated settings. Keep one known endpoint as the reference while you investigate.
For imports, first verify one entry and one profile. Once that works, inspect which profile receives each imported endpoint. Several rows in a list do not by themselves prove that each row was assigned to a different profile or uses a different outgoing address.
The public IP tool checks the request from the browser window where you open it. It does not test an endpoint configured only in another application.
If the first attempt fails
Change one setting at a time and repeat the same request. Start with typing or paste errors, the selected protocol, and the active order. When an import string parses unexpectedly, inspect its fields rather than repeatedly pasting the whole value.
For an HTTP proxy response of 407, investigate proxy authentication. A different destination error needs its own diagnosis; a failing page alone does not identify which component rejected the request. See the connection testing guide for a fuller sequence.
To troubleshoot the connection, record the order number, application version, endpoint host and port, selected protocol, test time and exact error. Redact passwords and tokens. State whether the failure happens in the checker, the launched profile or only one destination.
Vision proxy questions
Why is a proxy missing in another folder?
Vision stores proxy entries at folder level. Check the folder containing the saved entry before adding another copy.
Must I fill in an IP-change link?
No. Vision documents it as an optional field. Use a link issued for that product if available; a purchase link or an unrelated website URL is not a substitute.
Can I start with a single profile instead of bulk import?
Yes. The documented creation sidebar supports adding the proxy while creating one profile. Use that route for a small, inspectable first test.
Choose a product for your connection requirements
Compare the available plans by billing unit, required location and application compatibility. A successful proxy connection is not a guarantee that a website will accept an account or request. Use the service within the destination’s rules and your authorization.
All application setup guides include the existing AdsPower walkthrough. For current interface details, also see Vision proxy storage and protocols overview.
Choose a proxy for your browser profiles
Use residential traffic for country and city settings, rotation or sticky sessions. Start with 1 GB for $8, then generate connections in Telegram. Choose datacenter rental when your profile needs a static rented IP: from $2.50 per IP for 30 days.
Residential packages → · Static IP plans → · Test your connection →